Introduction
Have you ever craved something sweet yet felt guilty about indulging? The search for a guilt-free dessert can be quite frustrating. Enter the Irresistibly Creamy Blissful Protein Cheesecake, a delectable treat that can satisfy those sweet cravings without derailing your healthy eating goals. This recipe isn’t just about enjoying a slice of cheesecake; it’s about creating meaningful moments—perhaps sharing a piece with a friend or savoring a quiet moment to yourself with a rich, creamy bite. Each mouthful can transport you to a place where cravings and guilt no longer exist, just pure bliss.
Picture this: after a long day filled with responsibilities and chores, you can whip up this delightful cheesecake in no time. It’s perfect for busy moms or professionals who need a quick, satisfying dessert to brighten their day. The Irresistibly Creamy Blissful Protein Cheesecake wraps you in warmth and comfort, making any evening feel special. With a simple recipe that’s easy to follow, you can turn an ordinary night into a mini celebration, giving yourself permission to enjoy life one creamy bite at a time.
Why we love this recipe
The combination of rich and creamy layers makes this cheesecake stand out. The crust is subtly sweet and crumbly, providing the perfect base for the cloud-like filling. Each bite of this delightful dessert offers a balance of flavors that will make your taste buds dance. What’s more, the sweetness comes from wholesome ingredients, allowing you to indulge without having to worry about refined sugars or unhealthy fats.
Creamy Protein Cheesecake
With the Creamy Protein Cheesecake, you get to enjoy a dessert that is not only satisfying but also packed with protein, making it a wonderful option for a post-workout treat or a quick breakfast on the go. It’s versatile and can be topped with your favorite fruits or a drizzle of chocolate for an extra touch. Easy to prepare and utterly delicious, this cheesecake proves that nourishing your body and treating your taste buds can coexist beautifully. The best part? You can feel good about fueling your body with this guilt-free indulgence!
Step-by-Step Cooking Instructions
Now that you’ve gathered all the ingredients and tools needed, it’s time to embark on a delightful culinary journey to create the most delectable Creamy Protein Cheesecake. Each step is designed to help you achieve a velvety texture and fantastic flavor. By following the instructions carefully, you’ll be able to wow your friends and family with this deliciously healthy dessert.
Step 1: Prepare Your Baking Dish
Start by grabbing a springform pan, which is essential for the perfect Creamy Protein Cheesecake. Lightly grease the bottom and sides with a little coconut oil or cooking spray to ensure easy release. This preparation will help you avoid any sticky situations when it’s time to unveil your cheesecake masterpiece.
Step 2: Make the Crust
Combine your preferred crust ingredients in a mixing bowl, choosing from options like crushed almonds, oats, or graham crackers. Mix these with melted coconut oil until the mixture resembles wet sand. Next, firmly press this crust mixture into the base of your springform pan. The key here is to pack it tightly to create a sturdy foundation for your Creamy Protein Cheesecake. Pop this crust into the refrigerator while you prepare the filling to let it set slightly.
Step 3: Blend the Filling
In a high-speed blender or food processor, combine the main filling ingredients: your choice of cream cheese, yogurt, and protein powder. Blend until perfectly smooth and creamy, which will be the heart of your Creamy Protein Cheesecake. Don’t forget to scrape down the sides to ensure all ingredients are fully incorporated. The blending process should create a luscious texture that’s truly irresistible.
Step 4: Sweeten the Deal
Now it’s time to add flavor! To the filling, incorporate your choice of sweetener, such as maple syrup or stevia, along with a splash of vanilla extract. Blend it all together once more, adjusting sweetness according to your taste. When done, you should have an incredibly creamy and delightful filling that promises to elevate your dessert to new heights.
Step 5: Assemble and Bake
Pour the creamy filling onto your prepared crust and smooth it out with a spatula. This is where the magic happens! Bake in a preheated oven until the edges are set but the center still jiggles slightly. This jiggle is a good sign of a perfectly baked Creamy Protein Cheesecake that will set beautifully once cooled.
Step 6: Chill and Serve
After baking, allow your cheesecake to cool at room temperature for a bit before transferring it to the fridge. Let it chill for at least four hours, or overnight if you can resist. Chilling enhances the flavors and sets the cheesecake to the creamy consistency you’re aiming for. When ready to serve, gently release the springform pan and slice into generous portions.
Detailed Directions and Instructions
Notes
Tip 1: Experiment with Flavors
Feel free to experiment with different extracts or mix in ingredients like cocoa powder or fruit puree for added flavors. The beauty of this Creamy Protein Cheesecake lies in its versatility.
Tip 2: Make it Ahead
Preparing this cheesecake the day before is an excellent strategy. It allows the flavors to meld beautifully, ensuring an even more delightful experience when serving.
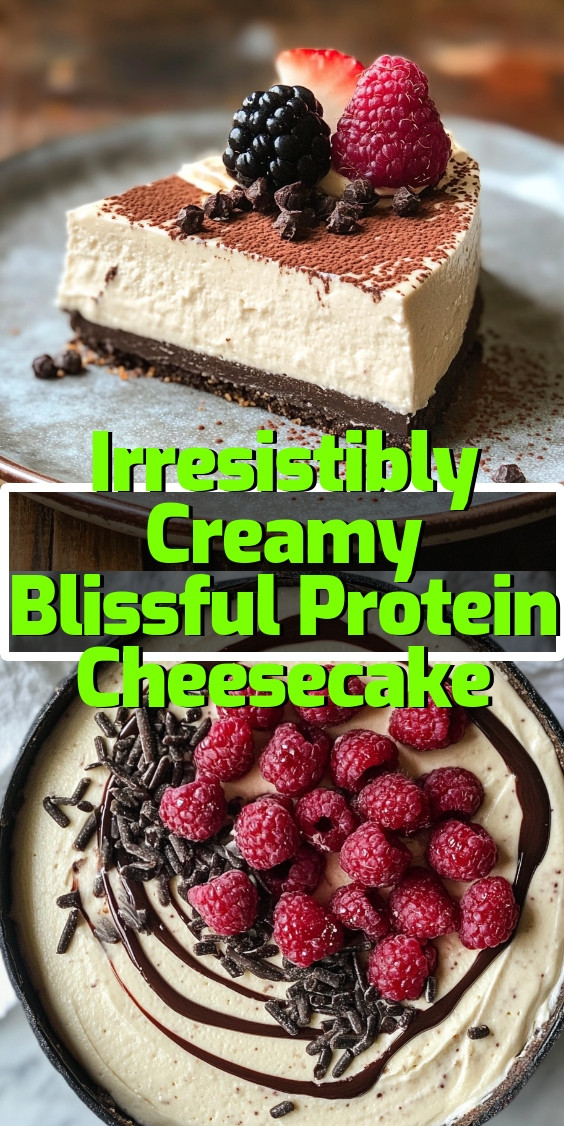
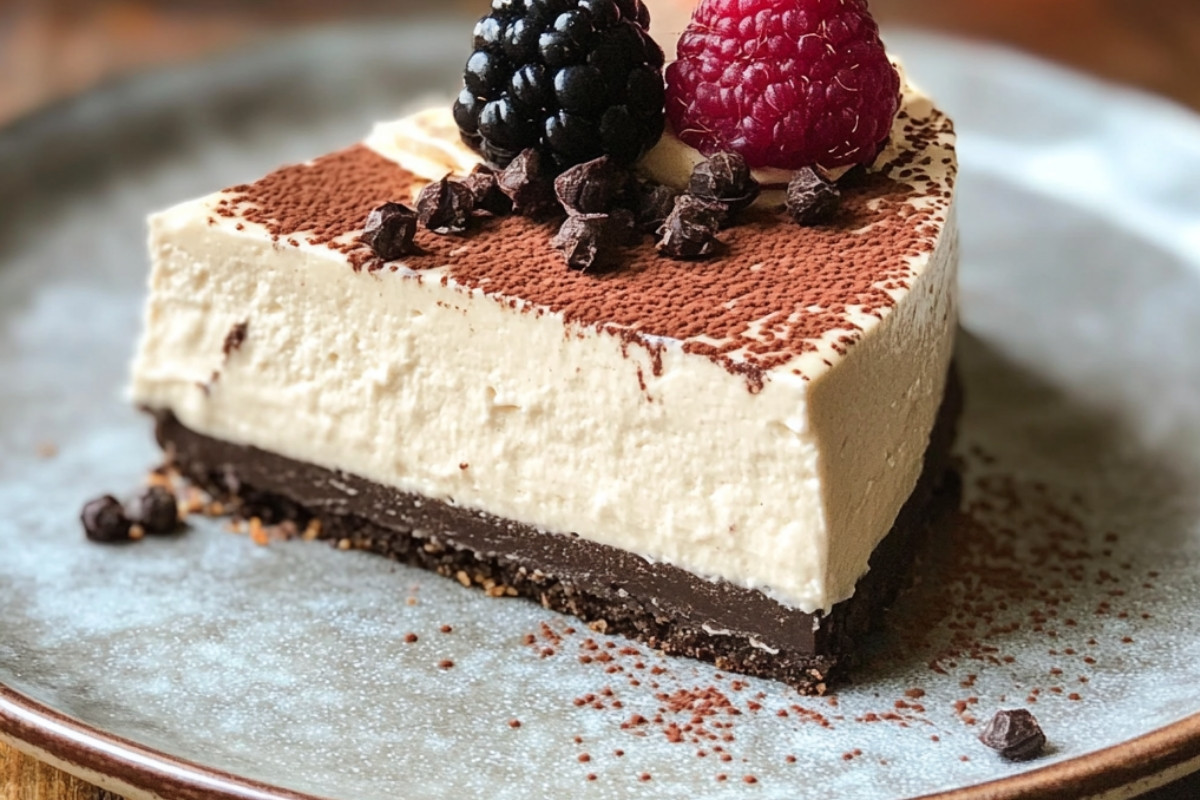
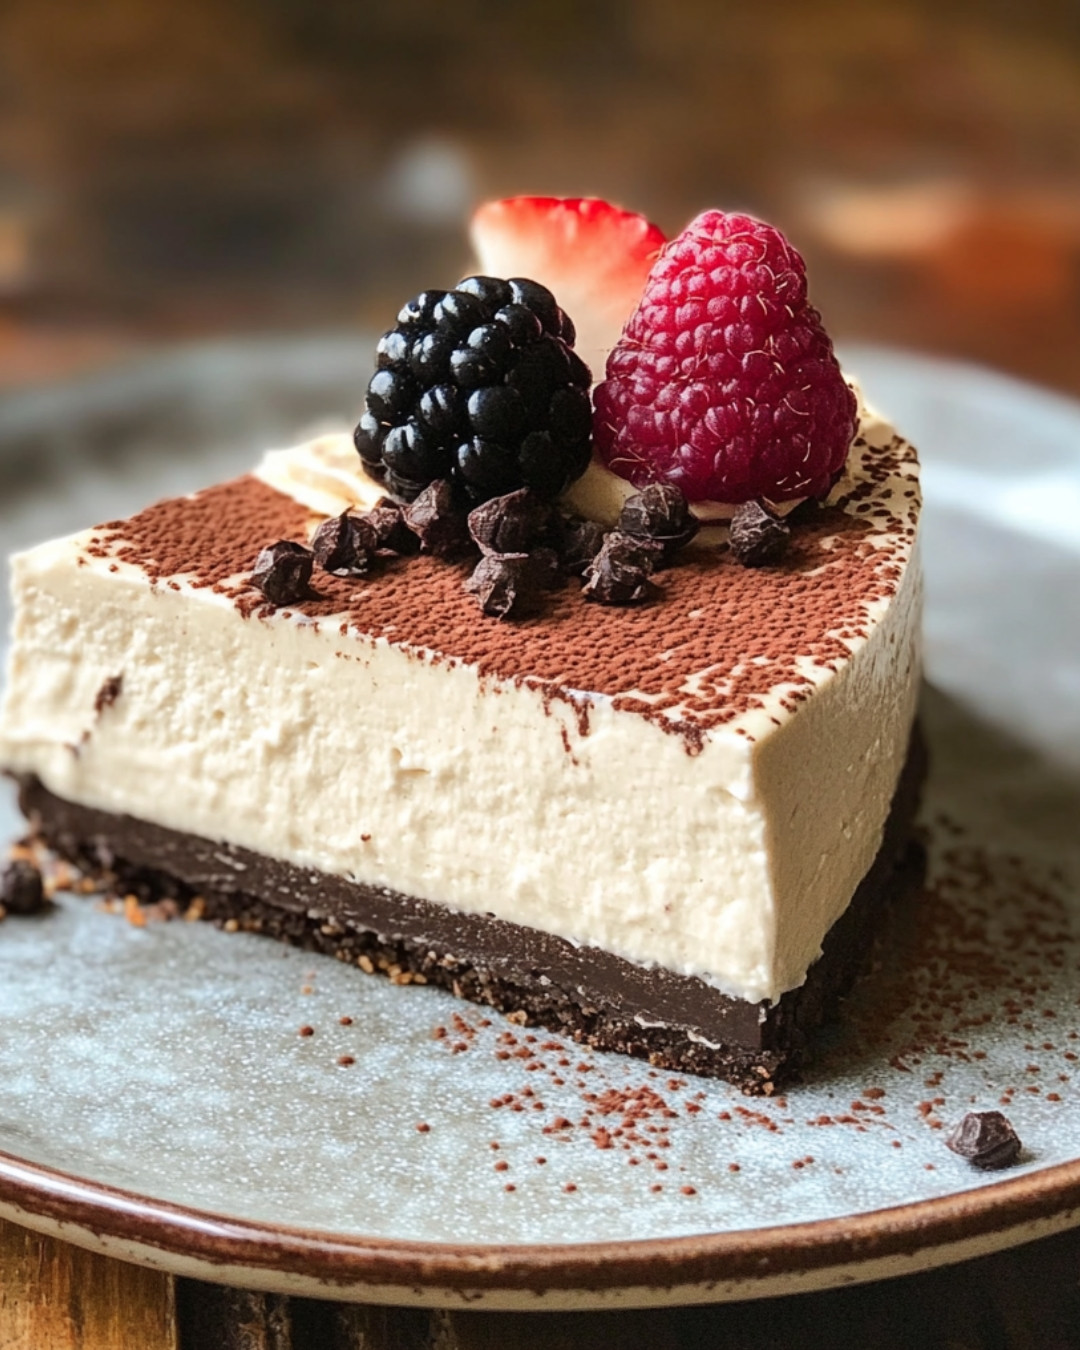
Tip 3: Decoration Delight
Want to impress? Top your finished Creamy Protein Cheesecake with fresh berries, a drizzle of dark chocolate, or a dollop of whipped cream for an impressive touch that’s sure to wow your guests.
Additional Tips for Your Cheesecake Adventure
Utilizing quality ingredients is essential in achieving the best flavor for your Creamy Protein Cheesecake. Choose fresh, high-quality dairy and protein powders for a rich taste. You can also use Greek yogurt for added creaminess and protein. Not only will your cheesecake be delicious, but it will also be packed with nutrition!
Serving Suggestions and Pairings
Imagine serving your Creamy Protein Cheesecake alongside a steaming cup of coffee or a refreshing herbal tea. For a contrasting texture, consider pairing it with a crunchy granola topping or a vibrant fruit compote. These additions will complement the creamy richness of the cheesecake and create an unforgettable dining experience.
Creating Memorable Moments with Cheesecake
Cooking is not just about food; it’s about creating memories. Gather your friends or family to join you in this cheesecake-making adventure. Sharing the process and enjoying the outcome together will make your Creamy Protein Cheesecake even more special. Laughter, stories, and delicious bites are a recipe for joy!
Common Mistakes to Avoid
One common mistake is overmixing the filling after adding the eggs. This can incorporate too much air, leading to a cracked surface. Instead, mix just until combined to keep your Creamy Protein Cheesecake smooth and even. Overbaking is another error to watch out for; a soft center ensures a creamy texture, so take it out while it still has a slight jiggle. With a little caution and attention, you’ll master the art of the perfect cheesecake!
Key ingredients
- 1 cup Greek yogurt (or dairy-free alternative)
- 1 cup cottage cheese (or dairy-free alternative)
- 1/4 cup protein powder (any flavor you prefer)
- 1/4 cup maple syrup (or other sweetener of choice)
- 1 tablespoon vanilla extract
- 1 teaspoon lemon juice
- 1/4 teaspoon salt
- 1/4 cup chocolate chips (optional)
Preparation Time
- Prep Time: 15 minutes
- Cook Time: 0 minutes
- Total Time: 15 minutes
- Yield: Serves 8
Cook Techniques
Mixing Creamy Ingredients
Start by blending your cream cheese and protein powder until smooth. This ensures there are no lumps and that the texture remains creamy throughout.
Baking for the Perfect Texture
Bake the cheesecake at a low temperature to avoid cracking. This gentle cooking method helps maintain that deliciously creamy texture, vital for a Creamy Protein Cheesecake.
Using a Water Bath
Consider using a water bath during baking. It provides moisture, which helps regulate temperature and results in a smoother cheesecake.
Cooling Gradually
Allow the cheesecake to cool slowly after baking. This helps set the texture without sudden temperature changes, which can lead to cracks.
Serving and Presentation Ideas:
Serve your Creamy Protein Cheesecake chilled, topped with fresh berries or a drizzle of chocolate sauce for an indulgent touch. Consider using small mason jars for individual servings, making them perfect for gatherings. Pair with a dollop of whipped cream for added richness, or sprinkle with crushed nuts for a delightful crunch.
People Also Ask :
What makes this cheesecake high in protein? The addition of protein powder and low-fat cream cheese contributes to the high protein content, making it a nutritious dessert option.
Can I make this cheesecake without a crust? Yes, feel free to omit the crust for a lighter version. The cheesecake will still hold well and maintain its Creamy Protein Cheesecake texture.
How long does the cheesecake last in the fridge? Stored properly, the cheesecake can last up to a week in the refrigerator, making it a great make-ahead dessert.
Conclusion
Creating a Creamy Protein Cheesecake not only satisfies sweet cravings but also offers a nutritious boost. This recipe encourages creativity and personalization, inviting you to explore different toppings and presentations. Each bite is a delicious reminder that you can indulge without sacrificing your health goals. What unique twists have you tried with your cheesecake? I would love to hear your experiences and ideas!
FAQ
Can I use a different type of protein powder?
Absolutely! Different protein powders work well. Just keep in mind that flavors may vary.
Is it possible to make this cheesecake vegan?
Yes, substitute cream cheese with a vegan alternative and use a plant-based protein powder for a vegan Creamy Protein Cheesecake.
Can I freeze leftover cheesecake?
Yes, you can freeze it. Just wrap it well in plastic wrap before placing it in the freezer.