Introduction
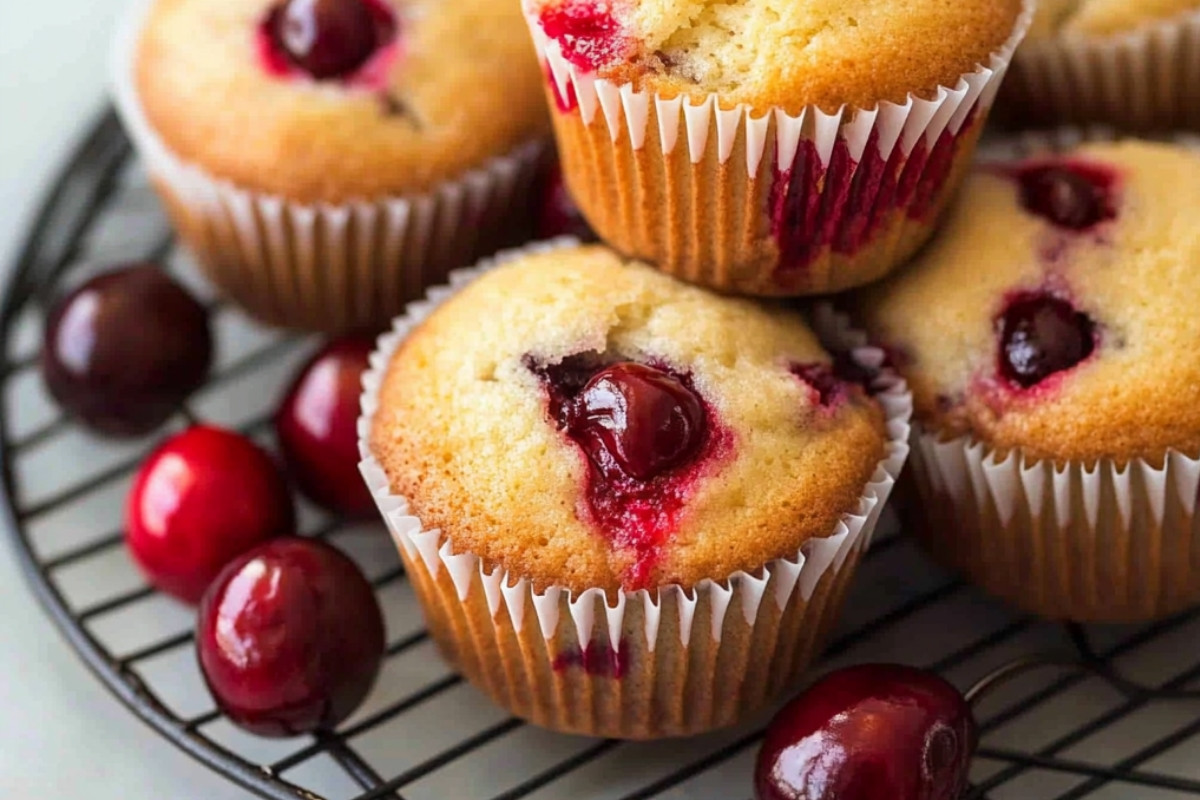
Life can often feel like a whirlwind, zooming past us faster than we can catch our breath. In moments like these, a warm batch of homemade Cherry Muffins Delight can bring comfort and joy that’s just hard to resist. Picture yourself surrounded by the fragrant aroma of fresh cherries and vanilla wafting from the oven, creating a warm and inviting atmosphere. These muffins aren’t just a quick treat; they hold the power to turn your ordinary day into a special occasion, whether it’s a casual brunch with friends or a delightful snack for your family. It’s often the simple things that create lasting memories. Gathering in the kitchen with loved ones, laughing over spilled flour, or sneaking bites of batter brings happiness that lingers long after the last muffin is eaten. The delightful little pockets of juicy cherries in each muffin can evoke feelings of nostalgia, reminding us of summer days spent picking fruit or baking with family. As you embark on this easy recipe, know that each muffin you make is not just about satisfying your sweet tooth; it’s about creating moments that you’ll cherish for years to come.Why we love this recipe: Cherry Muffins
One of the best things about these Cherry Muffins is their irresistible flavor. Each bite bursts with juicy cherries, perfectly complemented by a fluffy, moist base that keeps you coming back for more. The sweet balance of cherries and a hint of vanilla creates a taste experience that feels both comforting and refreshing. Furthermore, these muffins rise beautifully, giving you a delightful treat that looks just as good as it tastes. Additionally, the simplicity of making Cherry Muffins is a huge plus. Whether you’re a seasoned baker or a newcomer to the kitchen, the straightforward ingredients and quick preparation make it a stress-free endeavor. This recipe calls for basic ingredients that you likely already have on hand and requires minimal steps, ensuring that you can whip up a batch even on your busiest days. Enjoying homemade treats shouldn’t feel overwhelming, and this recipe exemplifies how easy it can be to bring a little joy into your life.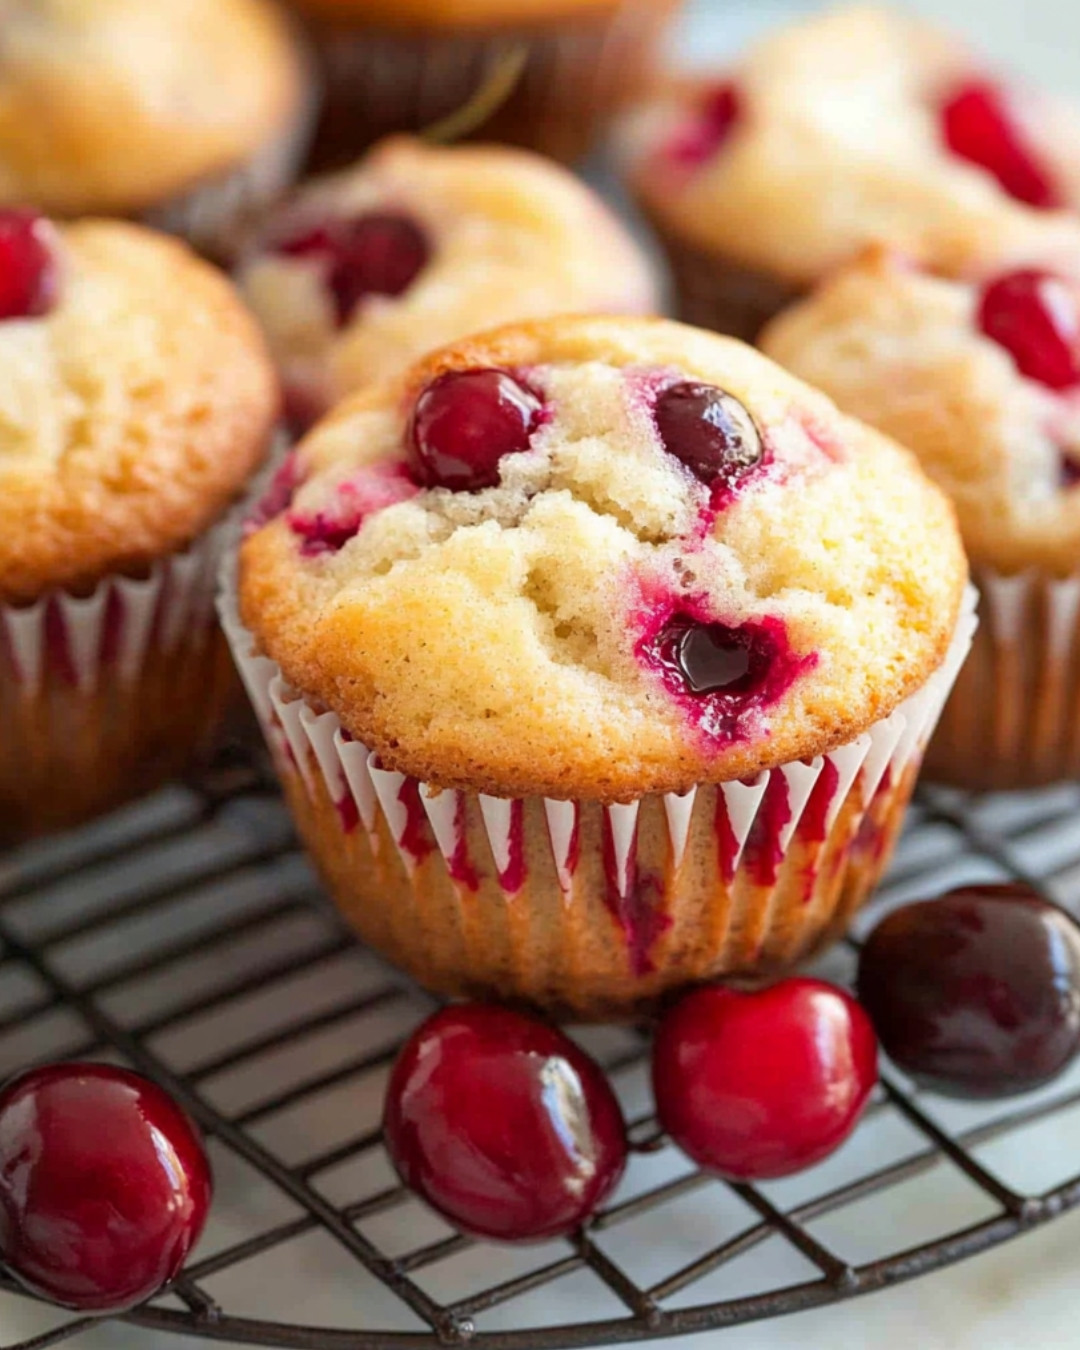
Step-by-Step Cooking Instructions
Now that you’ve gathered your ingredients and tools for those delightful Cherry Muffins, it’s time to embark on a sweet baking adventure. These steps will guide you through transforming fresh cherries and simple pantry items into a batch of fluffy and flavorful muffins that will fill your kitchen with an irresistible aroma. Get ready for a fun and rewarding baking experience!Step 1: Preheat the Oven
Start by preheating your oven to 350°F (175°C). This essential step ensures your Cherry Muffins cook evenly and achieve that perfect golden-brown top. While waiting for the oven to reach the desired temperature, take a moment to enjoy the anticipation of the deliciousness to come!Step 2: Prepare the Muffin Tin
Line your muffin tin with paper liners or grease it lightly with butter or cooking spray. This preparation will prevent your Cherry Muffins from sticking and make for easy cleanup later. Plus, those cute muffin liners will give your treats a charming touch!Step 3: Mix the Dry Ingredients
In a large mixing bowl, whisk together the flour, baking powder, salt, and sugar. These dry ingredients are the backbone of your muffins. Mixing them well ensures an even distribution of flavors and helps your Cherry Muffins rise beautifully. Enjoy the sweet, earthy aroma of the flour as you sift it through your fingers!Step 4: Combine the Wet Ingredients
In another bowl, crack the eggs and whisk them until smooth. Then add the milk and melted butter. These ingredients bring moisture and richness to the batter. Stir until fully incorporated, and feel the excitement as the mixture transforms into a creamy blend!Step 5: Combine Wet and Dry Mixtures
Gently pour the wet mixture into the dry ingredients. Stir the batter just until the flour is moistened – be careful not to overmix! Some lumps are perfectly fine; this is what keeps your Cherry Muffins fluffy and tender. It’s amazing how a few simple ingredients come together to create something so delightful!Step 6: Fold in the Cherries
Now comes the star of the show! Gently fold in the chopped cherries, taking care to distribute them evenly throughout the batter. Their juicy sweetness will burst with every bite of your Cherry Muffins, bringing a pop of flavor that will have everyone reaching for seconds!Step 7: Fill the Muffin Cups
Spoon the batter into the prepared muffin cups, filling each about two-thirds full. This allows enough room for your muffins to rise without overflowing. You’re just moments away from enjoying your freshly baked Cherry Muffins, so take a moment to admire your handiwork!Step 8: Bake to Perfection
Slide the muffin tin into the preheated oven and let them bake for about 20-25 minutes. You’ll know they’re done when the tops are golden brown and a toothpick inserted in the center comes out clean. The aroma wafting through your kitchen is going to be irresistible!Step 9: Cool and Enjoy!
Once baked, carefully remove the muffin tin from the oven. Allow the muffins to cool in the tin for a few minutes before transferring them to a wire rack. This step is crucial for keeping them from becoming soggy. Enjoy the anticipation of tasting your creation as they cool!Detailed Directions and Instructions
Step 1: Preheat the Oven
Set your oven to 350°F (175°C). This gets it ready for baking, ensuring that your Cherry Muffins are cooked evenly when they go in.Step 2: Prepare the Muffin Tin
Prepare your muffin tin with liners or grease it lightly. This prevents sticking and makes it easy to pop out your delicious muffins later.Step 3: Mix the Dry Ingredients
Combine flour, baking powder, salt, and sugar in a large bowl. Whisk them together to create a well-mixed dry base, ensuring every bite will be perfectly balanced in taste.Step 4: Combine the Wet Ingredients
In another bowl, whisk eggs, milk, and melted butter until well combined. This mixture will add moisture and flavor to your muffins, setting a great foundation.Step 5: Combine Wet and Dry Mixtures
Gently pour the wet mixture into the dry ingredients, stirring lightly until just mixed. Overmixing can lead to dense muffins, so take care to keep it light!Step 6: Fold in the Cherries
Add in the chopped cherries and fold them into the batter. This is where you infuse your muffins with juicy sweetness, making each bite a delightful experience.Step 7: Fill the Muffin Cups
Spoon the mixed batter into the muffin cups, about two-thirds full to allow room for rising. Admire your colorful cherry-speckled batter!Step 8: Bake to Perfection
Place the muffin tin in the preheated oven and bake for 20-25 minutes. Watch for that golden top, and let the delicious smell fill your kitchen!Step 9: Cool and Enjoy!
Remove the muffins from the oven, allow them to cool slightly, and transfer them to a wire rack. Enjoy the satisfaction of your baking skills while they cool down.Notes
Tip on Storage
Store your delicious Cherry Muffins in an airtight container at room temperature for up to three days. They remain soft and tasty during this time, allowing you to indulge whenever you wish!Freezing Suggestions
If you want to save some for later, wrap the cooled muffins individually in plastic wrap and place them in a freezer bag. They can be frozen for up to three months. Just thaw them at room temperature when you’re ready to enjoy a muffin!Fresh Cherry Alternatives
Don’t have fresh cherries? No problem! You can substitute with frozen cherries—just make sure to thaw and drain them before folding them into the batter. Your Cherry Muffins will still be a hit!Why Choose Homemade Cherry Muffins?
Baking your own Cherry Muffins means you can tailor them to your taste. You have the freedom to adjust the sweetness, incorporate extras like nuts or spices, or even top them with a sprinkle of sugar for some added crunch. The joy of creating something from scratch makes each muffin a labor of love!Perfect Pairings for Your Cherry Muffins
Enjoy your freshly baked Cherry Muffins alongside a warm cup of coffee or tea. They also make a wonderful breakfast treat or a delightful afternoon snack. Try serving them with a smear of cream cheese or a dollop of butter for extra indulgence!Experimenting with Your Cherry Muffins Recipe
Once you’re comfortable with the basic recipe, consider trying different flavor combinations. Adding a hint of almond extract or a sprinkle of cinnamon could elevate your Cherry Muffins to another level altogether. The possibilities are endless, and each batch offers an opportunity to get creative!Common Mistakes to Avoid
Overmixing the Batter
One of the most common mistakes is overmixing the batter, which can lead to tough muffins. Gently combine your ingredients until just mixed; a few lumps are fine!Not Prepping the Pan
Skipping the muffin tin preparation can lead to sticking. Always remember to grease the tin or use liners for easy removal.Ignoring Baking Time
Each oven can vary slightly, so keep an eye on your Cherry Muffins as they bake. Perform the toothpick test a few minutes before you think they might be done to avoid overbaking. Enjoy your baking journey, and watch your Cherry Muffins turn into a delicious, aromatic treat that brings joy to any occasion!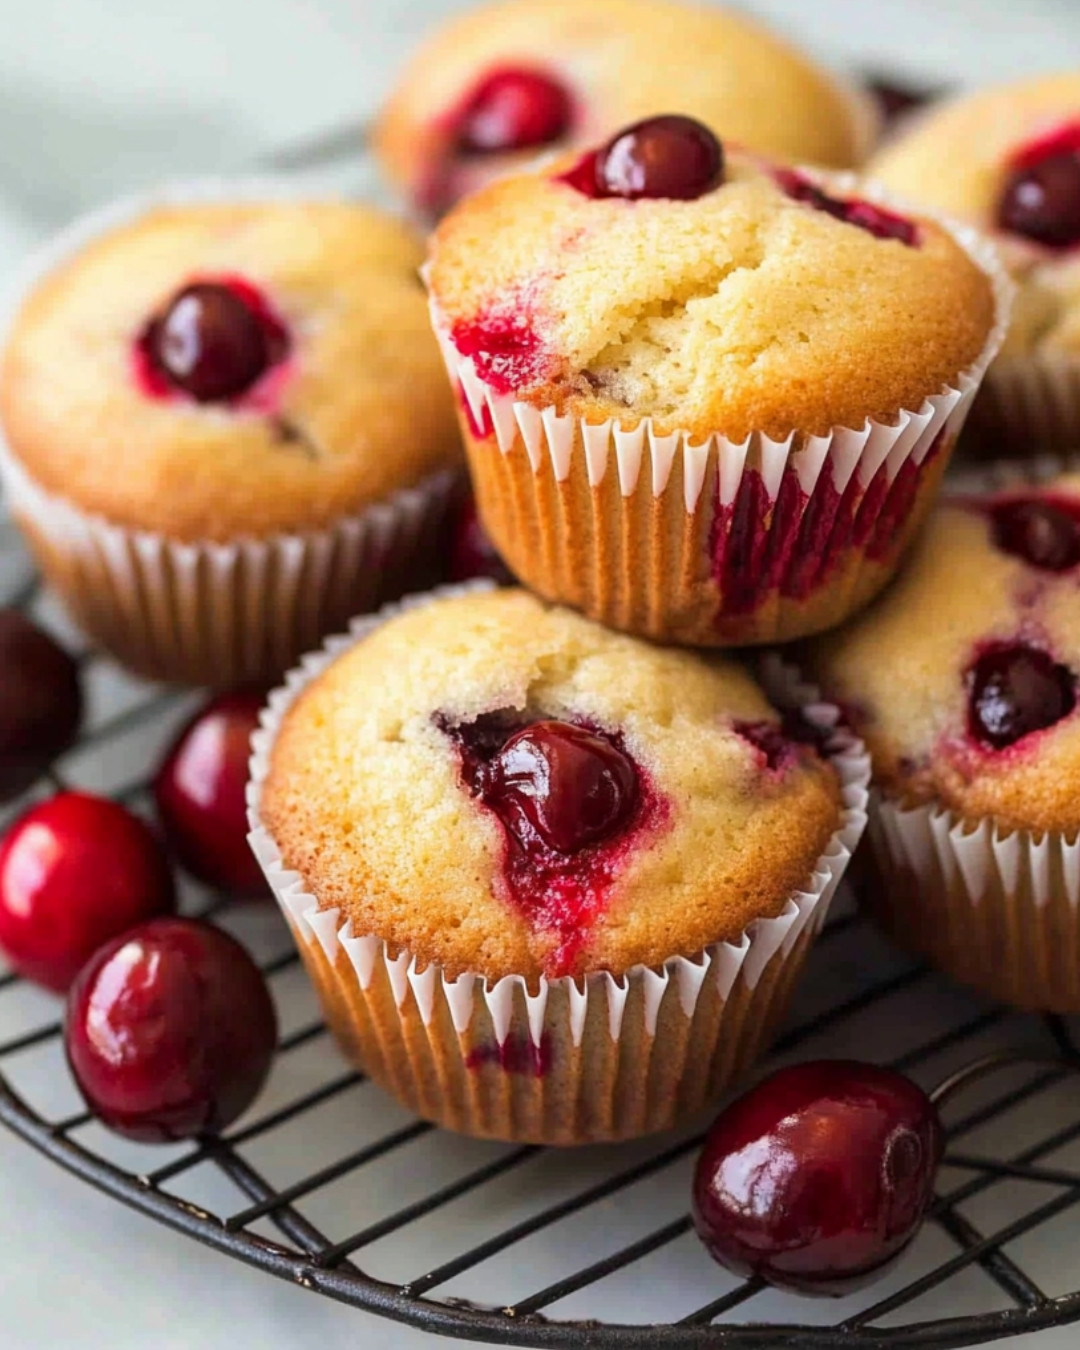
Key ingredients : Cherry Muffins
- 1 ¾ cup all-purpose flour
- 1 teaspoon baking powder
- ½ teaspoon baking soda
- ½ teaspoon salt
- ½ cup unsalted butter, softened
- 1 cup granulated sugar
- 2 large eggs
- 1 teaspoon vanilla extract
- ½ cup sour cream
- 1 ½ cup pitted and chopped fresh cherries
Preparation Time
- Prep Time: 15 minutes
- Cook Time: 22 minutes
- Total Time: 37 minutes
- Yield: 12 muffins
Cook techniques
Mixing Ingredients
Combining the dry and wet ingredients separately before merging ensures an even distribution. This method helps to avoid over-mixing, leading to tender muffins.Testing for Doneness
To check if the muffins are baked through, insert a toothpick into the center. If it comes out clean or with a few crumbs, the muffins are ready to be taken out of the oven.Cooling Properly
Allow the Cherry Muffins to cool in the pan for a few minutes before transferring them to a wire rack. This step prevents them from becoming soggy.Serving and Presentation Ideas:
Serve the Cherry Muffins warm, perhaps with a dusting of powdered sugar on top for a touch of elegance. Pair them with fresh cherries or a dollop of whipped cream on the side for a delightful contrast. They make an excellent breakfast option or a sweet treat for afternoon tea.People Also Ask:
Can I use frozen cherries in the recipe? Yes, frozen cherries can be used. Just ensure they are thawed and drained before adding them to the batter. How can I store leftover muffins? Store leftover Cherry Muffins in an airtight container at room temperature for up to three days, or refrigerate them to extend their freshness. Can I add nuts or chocolate to the muffins? Absolutely! Adding chocolate chips or chopped nuts can enhance the flavor and texture of your Cherry Muffins.Conclusion
Making Cherry Muffins is not only about following a recipe; it’s about bringing warmth into your kitchen and sharing delightful moments with loved ones. These muffins can capture the essence of a sunny day, wrapped in the sweetness of cherries. Whether you enjoy them for breakfast or as an afternoon snack, their inviting aroma is sure to create happy memories. Have you experimented with different fruits or flavors in your muffins? Share your thoughts and your own variations on this recipe; I would love to hear how you make your muffins!FAQ
Can I use a different type of fruit in the muffins?
Yes, you can substitute other fruits like blueberries or raspberries for a different twist on the Cherry Muffins.How long do muffins stay fresh?
When stored properly, Cherry Muffins can stay fresh for about three days at room temperature and up to a week in the refrigerator.What type of flour is best for muffins?
All-purpose flour is typically the best choice for making fluffy Cherry Muffins, but you can experiment with whole wheat flour for a denser texture.
Cherry Muffins Delight
Indulge in the irresistible allure of Cherry Muffins Delight, an easy-to-make treat bursting with juicy cherries and a hint of vanilla. Perfect for breakfast, brunch, or a cozy afternoon snack, these muffins are a delicious way to enjoy the flavors of ripe cherries. Whether you’re an experienced baker or just starting out, this recipe is simple yet scrumptious. Brighten your day with homemade goodness and savor each fluffy bite. Click to explore the full recipe and bring a touch of sweetness to your kitchen today.
- Prep Time: 15 minutes
- Cook Time: 22 minutes
- Total Time: 37 minutes
- Yield: 12 muffins 1x
Ingredients
- 1 ¾ cup all-purpose flour
- 1 teaspoon baking powder
- ½ teaspoon baking soda
- ½ teaspoon salt
- ½ cup unsalted butter, softened
- 1 cup granulated sugar
- 2 large eggs
- 1 teaspoon vanilla extract
- ½ cup sour cream
- 1 ½ cup pitted and chopped fresh cherries
Instructions
Step 1: Preheat the Oven
Start by preheating your oven to 350 degrees F 175 degrees C This essential step ensures your Cherry Muffins cook evenly and achieve that perfect goldenbrown top While waiting for the oven to reach the desired temperature take a moment to enjoy the anticipation of the deliciousness to come
Step 2: Prepare the Muffin Tin
Line your muffin tin with paper liners or grease it lightly with butter or cooking spray This preparation will prevent your Cherry Muffins from sticking and make for easy cleanup later Plus those cute muffin liners will give your treats a charming touch
Step 3: Mix the Dry Ingredients
In a large mixing bowl whisk together the flour baking powder salt and sugar These dry ingredients are the backbone of your muffins Mixing them well ensures an even distribution of flavors and helps your Cherry Muffins rise beautifully Enjoy the sweet earthy aroma of the flour as you sift it through your fingers
Step 4: Combine the Wet Ingredients
In another bowl crack the eggs and whisk them until smooth Then add the milk and melted butter These ingredients bring moisture and richness to the batter Stir until fully incorporated and feel the excitement as the mixture transforms into a creamy blend
Step 5: Combine Wet and Dry Mixtures
Gently pour the wet mixture into the dry ingredients Stir the batter just until the flour is moistened be careful not to overmix Some lumps are perfectly fine this is what keeps your Cherry Muffins fluffy and tender Its amazing how a few simple ingredients come together to create something so delightful
Step 6: Fold in the Cherries
Now comes the star of the show Gently fold in the chopped cherries taking care to distribute them evenly throughout the batter Their juicy sweetness will burst with every bite of your Cherry Muffins bringing a pop of flavor that will have everyone reaching for seconds
Step 7: Fill the Muffin Cups
Spoon the batter into the prepared muffin cups filling each about twothirds full This allows enough room for your muffins to rise without overflowing Youre just moments away from enjoying your freshly baked Cherry Muffins so take a moment to admire your handiwork
Step 8: Bake to Perfection
Slide the muffin tin into the preheated oven and let them bake for about 2025 minutes Youll know theyre done when the tops are golden brown and a toothpick inserted in the center comes out clean The aroma wafting through your kitchen is going to be irresistible
Step 9: Cool and Enjoy
Once baked carefully remove the muffin tin from the oven Allow the muffins to cool in the tin for a few minutes before transferring them to a wire rack This step is crucial for keeping them from becoming soggy Enjoy the anticipation of tasting your creation as they cool
Notes
Tip on Storage
- Store your delicious Cherry Muffins in an airtight container at room temperature for up to three days. They remain soft and tasty during this time, allowing you to indulge whenever you wish!
Freezing Suggestions
- If you want to save some for later, wrap the cooled muffins individually in plastic wrap and place them in a freezer bag. They can be frozen for up to three months. Just thaw them at room temperature when you’re ready to enjoy a muffin!
Fresh Cherry Alternatives
- Don’t have fresh cherries? No problem! You can substitute with frozen cherries—just make sure to thaw and drain them before folding them into the batter. Your Cherry Muffins will still be a hit!
Keywords: Cherry Muffins