The Allure of Baking with Love
When it comes to celebrating life’s little moments, desserts have a remarkable way of bringing people together. Whether it’s a birthday, an anniversary, or an ordinary Tuesday that needs a spark of joy, indulging in something sweet often lifts our spirits. The Golden Oreo Delight perfectly embodies this sense of celebration, with its rich flavors and delightful textures, making it a favorite for any occasion. As life gets busy, having a simple yet impressive recipe like this can be a true game-changer.
The Comfort of Familiar Flavors
The blend of nostalgia and delight in the Golden Oreo Delight serves to remind us of simpler times. When you take that first bite, it’s hard not to smile and think of all the delightful moments shared over a dessert table crowded with sweet treats. This cake reflects the kind of love and care that goes into baking, providing a comforting embrace in each slice, which is just what we need in our fast-paced lives.
Why We Love This Recipe: The Golden Oreo Delight
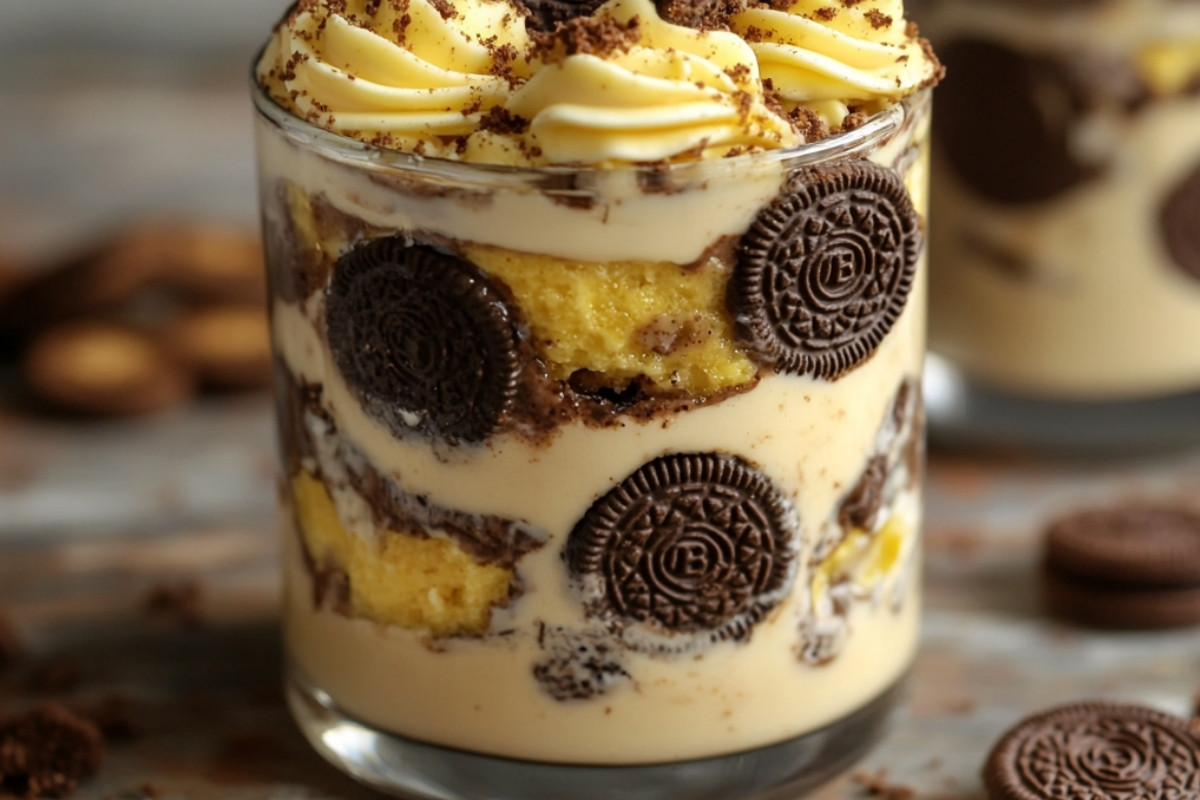
Fluffy cake layers: The cake itself is light and fluffy, making for a great base that pairs wonderfully with the creamy frosting. Golden Oreos: These iconic cookies add a unique flavor that stands out beautifully in the cake. Cream cheese frosting: A luscious cream cheese frosting binds all the flavors together, delivering the perfect creamy contrast to the cake. Easy assembly: Even beginners can whip this cake together with minimal fuss. Perfect for sharing: The Golden Oreo Delight is a showstopper that you’ll want to share with everyone!
Key Ingredients for the Golden Oreo Delight
The Golden Oreo Delight is made using simple yet delightful ingredients that contribute to its amazing flavor and texture. You will need all-purpose flour, granulated sugar, baking powder, eggs, vanilla extract, milk, butter, and of course, Golden Oreos for that unique twist. Additionally, the creamy frosting calls for cream cheese, powdered sugar, and heavy cream. Each ingredient plays an essential role in creating a cake that is not just delicious, but also a joy to make!
A Sweet Escape with Golden Oreo Delight
Life can be chaotic, but baking the Golden Oreo Delight allows you to escape for a little while. As you mix and measure, the familiar scents will wrap around you like a warm hug. You can invite your kids to join in, making it a fun family activity or simply treat yourself to some well-deserved me-time. The process is as rewarding as the end result, fulfilling both your creative and sweet cravings!

Step-by-Step Cooking Instructions
Now that you’ve got your pantry stocked full of the delightful ingredients for this scrumptious Golden Oreo Cake, it’s time to dive into the cooking adventure! Each step unfolds like a baking saga, crafting a cake that will surely become the center of attention at your table. Let’s embark on this culinary journey together!
Step 1: Preheat the Oven
Start by preheating your oven to a toasty 350°F (175°C). This initial step is vital as it prepares the perfect environment for your cake to rise beautifully. While that warm kiss from the oven is setting the stage, you can direct your focus on the next exciting step.
Step 2: Prepare Your Cake Pans
Grease and flour two 9-inch round cake pans. This ensures your cake can slip out naked and flawless once it’s baked. Feel free to sprinkle a bit of flour inside after greasing—it’s like giving your cake a cushy bed to rest on while cooking!
Step 3: Mix the Dry Ingredients
In a mixing bowl, whisk together the flour, baking powder, and salt. This combination creates the foundational structure of your cake. As you mix, inhale the scent of the flour—it’s like a gentle reminder of the deliciousness to come!
Step 4: Cream Butter and Sugars
In another bowl, using an electric mixer, cream together the butter, granulated sugar, and brown sugar until the mixture becomes light and fluffy. This process introduces air into your batter, giving it that dreamy texture we all adore. The moment you see the transformation from gritty to creamy, get ready for your cake to become magical!
Step 5: Add Eggs and Vanilla
Beat in the eggs, one at a time, ensuring each is fully incorporated before adding the next. Then, add in that luscious vanilla extract. This is where the cake begins to come alive, filling the air with a rich, sweet aroma.
Step 6: Alternate Adding Dry Ingredients and Milk
Gradually add the dry mixture to the wet mixture, alternating with the buttermilk. Start and end with the dry ingredients. As you mix, watch the batter deepen in color and develop a silky smooth texture. This luscious blend is the heartbeat of your cake!
Step 7: Fold in the Golden Oreos
Gently fold in those delightful crushed Golden Oreos. Each piece will add a heavenly crunch and burst of flavor to your cake, turning a classic treat into something uniquely scrumptious. You might just want to sneak a few for yourself!
Step 8: Bake Your Cake
Pour the batter evenly into the prepared pans and place them in your preheated oven. Bake for about 25-30 minutes, or until a toothpick inserted in the center comes out clean. Keep an eye on them; nothing feels quite as rewarding as watching your cake rise into golden perfection!
Step 9: Cool the Cakes
Once baked, remove the cakes from the oven and let them sit in the pans for about 10 minutes. Then, turn them out onto a wire rack to cool completely. This waiting period can be torturous, but it’s crucial for achieving the ideal frosting application later!
Step 10: Frost the Cakes
Whip up your favorite frosting, then generously spread it over the cooled cakes. Don’t shy away from getting creative! Here’s your moment to add extra crumbled Oreos on top, elevating the visual appeal and flavor to new heights.
Detailed Directions and Instructions
Step 1: Preheat the Oven
Start by preheating your oven to a toasty 350°F (175°C). This initial step is vital as it prepares the perfect environment for your cake to rise beautifully. While that warm kiss from the oven is setting the stage, you can direct your focus on the next exciting step.
Step 2: Prepare Your Cake Pans
Grease and flour two 9-inch round cake pans. This ensures your cake can slip out naked and flawless once it’s baked. Feel free to sprinkle a bit of flour inside after greasing—it’s like giving your cake a cushy bed to rest on while cooking!
Step 3: Mix the Dry Ingredients
In a mixing bowl, whisk together the flour, baking powder, and salt. This combination creates the foundational structure of your cake. As you mix, inhale the scent of the flour—it’s like a gentle reminder of the deliciousness to come!
Step 4: Cream Butter and Sugars
In another bowl, using an electric mixer, cream together the butter, granulated sugar, and brown sugar until the mixture becomes light and fluffy. This process introduces air into your batter, giving it that dreamy texture we all adore. The moment you see the transformation from gritty to creamy, get ready for your cake to become magical!
Step 5: Add Eggs and Vanilla
Beat in the eggs, one at a time, ensuring each is fully incorporated before adding the next. Then, add in that luscious vanilla extract. This is where the cake begins to come alive, filling the air with a rich, sweet aroma.
Step 6: Alternate Adding Dry Ingredients and Milk
Gradually add the dry mixture to the wet mixture, alternating with the buttermilk. Start and end with the dry ingredients. As you mix, watch the batter deepen in color and develop a silky smooth texture. This luscious blend is the heartbeat of your cake!
Step 7: Fold in the Golden Oreos
Gently fold in those delightful crushed Golden Oreos. Each piece will add a heavenly crunch and burst of flavor to your cake, turning a classic treat into something uniquely scrumptious. You might just want to sneak a few for yourself!
Step 8: Bake Your Cake
Pour the batter evenly into the prepared pans and place them in your preheated oven. Bake for about 25-30 minutes, or until a toothpick inserted in the center comes out clean. Keep an eye on them; nothing feels quite as rewarding as watching your cake rise into golden perfection!
Step 9: Cool the Cakes
Once baked, remove the cakes from the oven and let them sit in the pans for about 10 minutes. Then, turn them out onto a wire rack to cool completely. This waiting period can be torturous, but it’s crucial for achieving the ideal frosting application later!
Step 10: Frost the Cakes
Whip up your favorite frosting, then generously spread it over the cooled cakes. Don’t shy away from getting creative! Here’s your moment to add extra crumbled Oreos on top, elevating the visual appeal and flavor to new heights.
Notes
Note 1: Room Temperature Ingredients
Ensure your butter and eggs are at room temperature before starting. This helps them mix more easily and results in a better texture.
Note 2: Spice It Up
Feel free to add a pinch of cinnamon to your batter for an exciting flavor twist. It adds warmth that pairs beautifully with the Golden Oreos!
Note 3: Storage Tips
Store any leftovers in an airtight container at room temperature for up to 3 days, or refrigerate for up to a week. You’ll want to savor every scrumptious bite!
Tips for Success
Understand Baking Time
Baking times can vary based on your oven and the pans you use. Keep an eye on the cakes in the last few minutes of baking; overcooking can lead to dry cake!
Experiment with Frosting
Don’t limit yourself to traditional frostings. Whip cream, whipped frosting, or even a drizzle of chocolate ganache can elevate your cake to gourmet levels of deliciousness.
Serving Suggestions
Dress it Up
Serve slices of your Golden Oreo Cake with a scoop of vanilla ice cream or a dollop of freshly whipped cream. The contrast of temperatures will make every bite heavenly!
Perfect for Any Occasion
This cake is versatile! Whether it’s a birthday, anniversary, or just because, its irresistible flavors and stunning presentation make it the perfect conversation starter.
Common Mistakes to Avoid
Ensure your oven is fully preheated before baking the cakes. Skipping this step can lead to uneven baking. Avoid opening the oven door too early; this can cause your cakes to sink in the middle.
Use fresh baking powder for the best rise. Old baking powder might lead to dense cakes. Lastly, remember to let your cake cool completely before frosting to prevent melting and sliding around. Enjoy every moment in the kitchen with this delightful Golden Oreo Cake!
Key ingredients
- Flour – 2 ¾ cups all-purpose flour
- Baking Powder – 1 tbsp
- Baking Soda – ½ tsp
- Salt – ½ tsp
- Butter – 1 cup unsalted butter, softened
- Sugar – 1 ½ cups granulated sugar
- Brown Sugar – ½ cup packed light brown sugar
- Eggs – 4 large eggs
- Vanilla Extract – 2 tsp
- Milk – 1 cup whole milk
- Golden Oreos – 1 ½ cups crushed
- Whipped Cream – 2 cups for frosting
- Golden Oreos – additional for decoration
Preparation Time
- Prep Time: 30 minutes
- Cook Time: 30 minutes
- Total Time: 1 hour
- Yield: 12 servings
Cook techniques
Creating the Cake Layers
To achieve the perfect cake layers, make sure to properly cream the butter and sugar. This process allows for the incorporation of air, ensuring that your Golden Oreo Delight structure is light and fluffy. Additionally, be careful not to overmix the batter after adding the dry ingredients, as this can lead to a denser cake.
Making the Frosting
For a creamy and smooth frosting, it’s essential to use room temperature butter. This ensures an even blend with the powdered sugar, preventing any graininess. Once combined, mix in crushed Golden Oreos for texture and flavor that truly represents this unique treat.
Assembling the Cake
When layering your cake, spread an even layer of frosting in between each layer. Use a spatula to create a smooth surface. Crumbling some Golden Oreos on top of the frosting between layers adds a delightful crunch to every bite.
Decorating the Cake
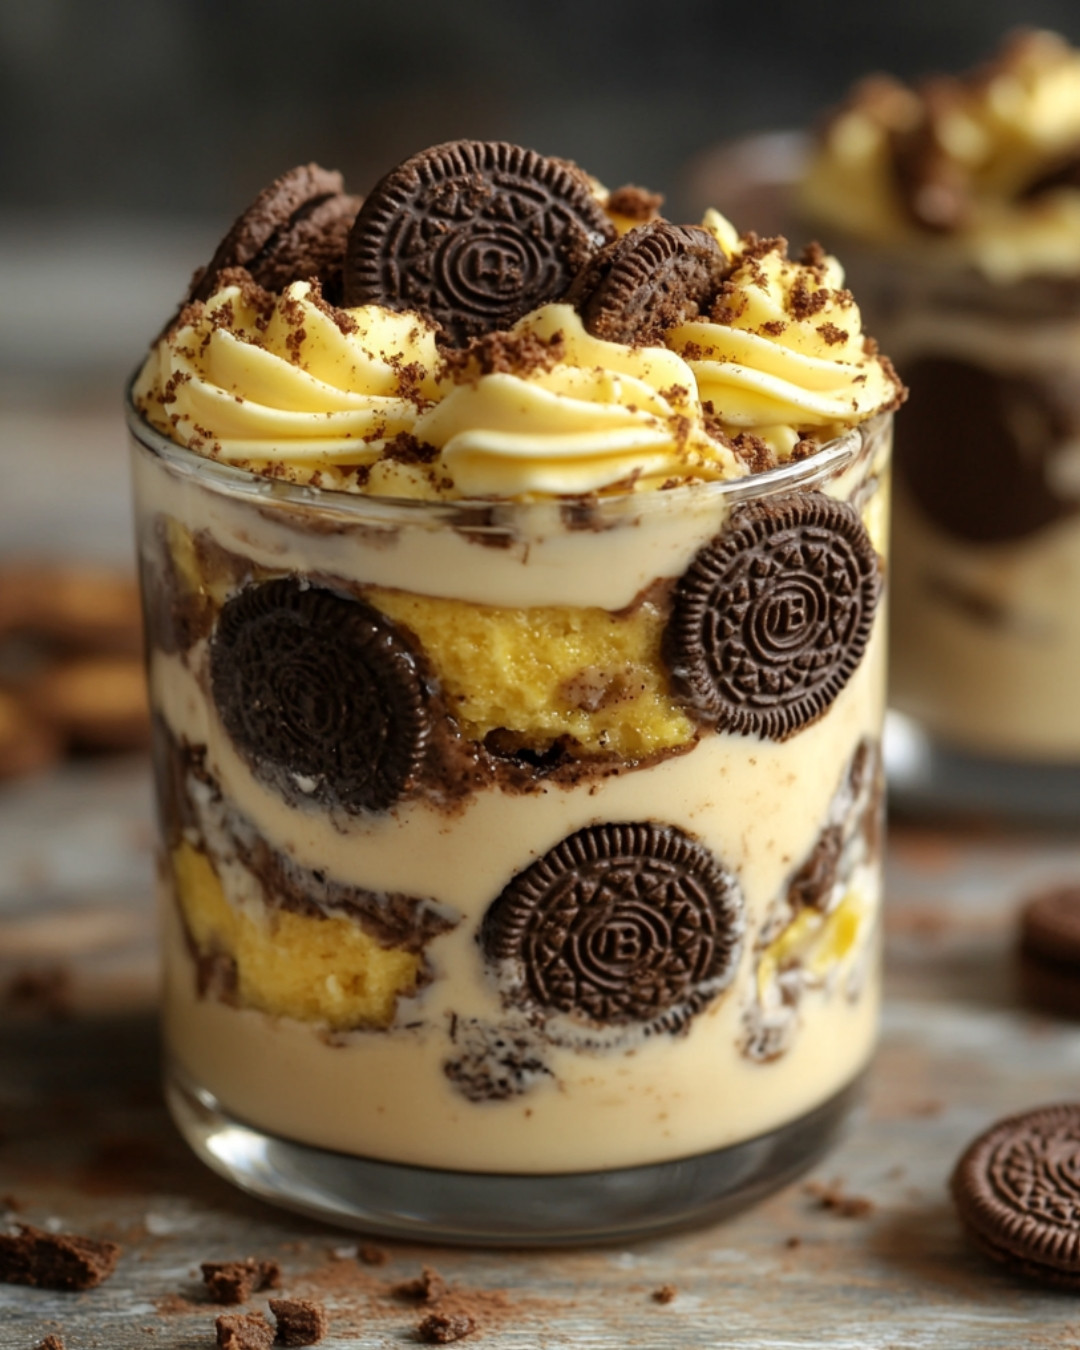
Finish off your Golden Oreo Delight by decorating the top and sides with more frosting. You can elegantly place whole Golden Oreos on top for a visually stunning presentation or sprinkle crushed pieces around the base for a decorative touch.
Serving and Presentation Ideas:
Serve slices of the Golden Oreo Delight on elegant plates to enhance the dessert’s appeal. Pair it with a scoop of vanilla ice cream or a drizzle of caramel sauce for added decadence. For an extra treat, consider topping each slice with fresh berries to balance the sweetness.
People Also Ask :
What flavor is the golden Oreo? The Golden Oreo features a vanilla-flavored cookie, offering a sweet and creamy taste that differs from the classic chocolate Oreo.
What flavor is golden cake? Golden cake has a rich buttery flavor with hints of vanilla, making it a versatile base for various frostings and toppings.
What does golden Oreo mean? Golden Oreo refers to the vanilla-flavored variant of the traditional Oreo cookie, often enjoyed by those seeking a different taste experience.
Are golden Oreos lemon flavored? No, Golden Oreos are not lemon-flavored. They remain a vanilla flavor, distinct from lemon-flavored desserts.
Conclusion
The Golden Oreo Delight is more than just a dessert; it’s a celebration of flavors and textures that come together beautifully. Each bite transports you to a place of comfort and joy, as you savor the creamy frosting and crunchy cookie bits. This cake is perfect for any occasion, and it invites creativity in both its presentation and personal touches. Have you tried making this delightful treat? We’d love to hear how your experience went or any variations you’ve come up with!
FAQ
Can I use a different type of cracker?
Yes, you can substitute with other types of cookies if you prefer, though keep in mind it may alter the overall flavor of your Golden Oreo Delight.
How should I store the cake?
Store the Golden Oreo Delight in an airtight container at room temperature for up to three days or in the refrigerator for up to a week.
Can I freeze the cake?
Absolutely! This cake freezes well, allowing you to enjoy your Golden Oreo Delight later. Wrap it tightly in plastic wrap, then foil, to keep it fresh.
What can I use as a substitute for butter in the frosting?
You may use cream cheese or a dairy-free butter substitute for a different flavor profile in your frosting while still achieving a creamy consistency.
Can kids help make this cake?
Yes! Kids can assist with mixing and decorating, making the process a fun family activity. Just be sure to supervise them closely, especially when using kitchen tools.